Culture Exchange Highlight
How to Make a Medicine Wheel
The medicine wheel is a symbol shared by many American Indian tribes. It is meant to be hung in the home to help bring health. To Natives, health is more than a matter of physical well-being. Good health means that all aspects of the world are in balance. The symbol is generally the same for all tribes and brings together the four directions in a circle with the colors of red, white, yellow, and black to represent the directions. The core of many Native beliefs is balance and that life is always in a connected circle. Each tribe, however, has its own story and meaning of the wheel. Can you find out the story of the wheel and the meaning of the colors in your own or your friends’ communities?
Meanwhile, you can start to explore the tradition by making your own medicine wheel!
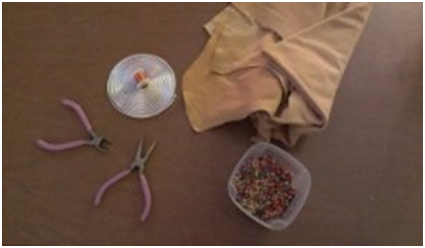
Supplies
These materials can be found in craft stores or online.
- Needle nose pliers
- Wire cutters
- Sculpting wire - 10 gauge preferred
- Fine thread artistic wire - 28 gauge
- Seed beads in yellow, red, black, white, and one other color of your choice is optional.
Instructional Note: The size used for this demonstration is size 8, but you can use whatever size you prefer
Cultural Note: The optional color, which goes in the center of the wheel, is something some tribes use for their stories of the medicine wheel. Ask your tribal elders to learn the medicine wheel story and the colors for your tribe.
- Leather/suede - Deer, cow, or goat
Instructional Note: Other materials such as ribbon or fabric can be used instead. However, leather and suede are more traditional and easier to wrap around the sculpting wire.
Instructions
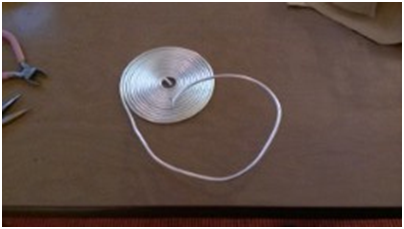
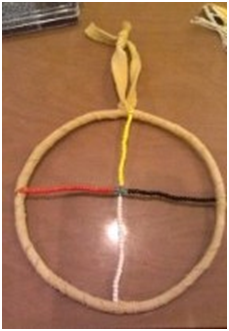
1. Bend the sculpting wire into a circle in the size you want to make your medicine wheel.

2. Measure the fine thread wire across the diameter of the circle, so there are about 2 inches left on each side.
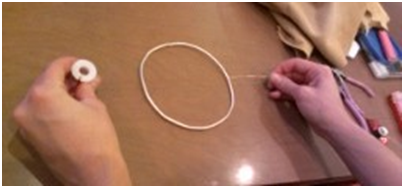
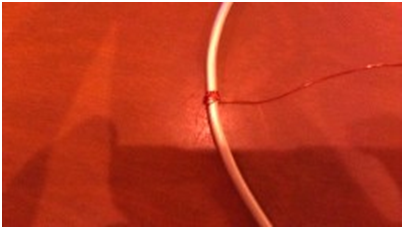
3. Wrap the 2 extra inches around one side of the sculpting wire. Make sure the point where the two ends of the sculpting wire meet are in between the places where the fine wire is wrapped.
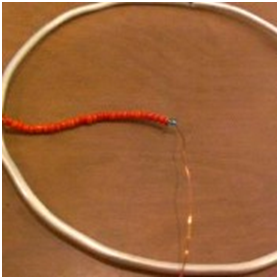
4. String one color of beads on the wire until you almost reach the middle of the circle. Leave space in the center of the wheel for the optional color of your choice.
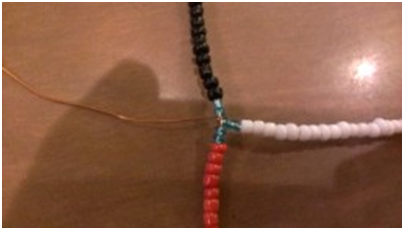
5. To estimate the center of the circle, bend the wire at a 90 degree angle in the middle of the circle. Place one or two beads of the color of your choice when you get close to the center. Re-straighten the wire to continue with the second half.
6. When beginning the second half of the wire, place the center colored beads first. Then add the next color you are going to use in your wheel. Once you reach the sculpting wire, wrap the fine wire tightly around the sculpting wire to finish one strand.

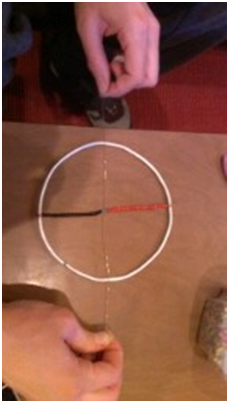
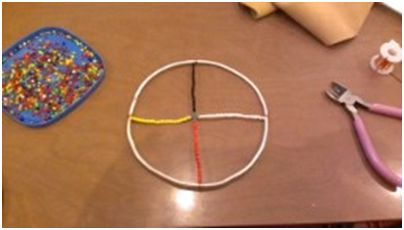
7. Repeat steps 2-6 with two more colors in the vertical direction. Once you reach the point where the wires cross, wrap one wire around the other at the center to make sure they stay in place.
8. Cut out a long strip of leather (suede strips also work). The length of this should be estimated based on the size of the wheel you are making.
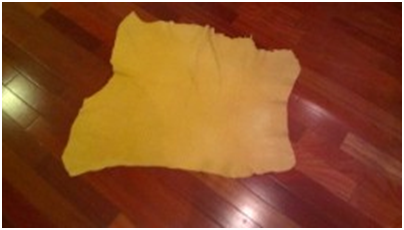
The strip should be longer than the circumference of the circle. Leave at least 2 inches at the end of the strip before you start wrapping.

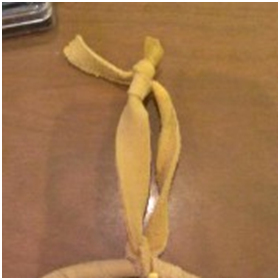
9. Tightly wrap the leather all the way around the sculpting wire. When you reach your beginning point, tie the ends together at the circle.
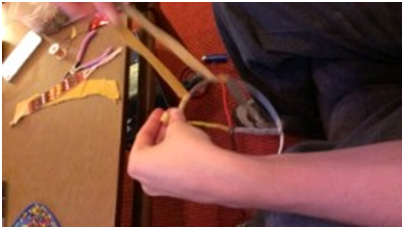
There should be two strands of extra leather. Tie these ends together to form a loop you can use to hang the medicine wheel.

 |
| Connecting you to Native America and fun! |

 | |
| Smithsonian National Museum of the American Indian | |
- Log in to post comments